Jellyfin is a FOSS media server forked from Emby before they went sketchy. jellyfin/jellyfin
So in a bid to speed up my jellyfin server, and cut costs I am now fully running my Jellyfin off of a vm on OVH with an s3 based backend, so this does work
I guess you could call this one of my shower thoughts as I wanted to be able to use jellyfin on a Digital ocean droplet or something external just so I don’t have to mess about with using a reverse proxy from my home servers, to Digital ocean then out to the world. Whilst I know I could have just opened the ports on my home network, I have a Dynamic IP address which changes every so often.
Yes, I could write a simple script to monitor the IP address and see when it changes, then update the domain, but that’s not complex enough for me, and I’m terrible at coding.
We will first start with the droplet. I suggest going with either of the below for Digital ocean

Or if Digital ocean isn’t your cuppa’ tea, then vultr have a reasonable product.

Or even GCP’s N2, N2D, N1 servers seem to bee half decent for Jellyfin.
There’s nothing stopping you from deploying this at home, just realise that you will need 50mbps+ download and ideally25mbps+ upload to be able to support multiple users streams externaly if you’re going though either an nginx reverse proxy like I am, or straight from you connection
What you want is cores over anything, especially if you’re going to be trans-coding.
Yes I did try and use the $5 tier from digital ocean and I wanted to commit alive’nt
Enough fuzz, lets get to it
You will need
- S3 compatible bucket - I suggest wasabi but you can also use Min.io if you’re in to FOSS (wasabi has a 30 day free 1tb trial)
- Ability to read and copy and paste.
The first step
First we will spin up a digital ocean droplet but you can use what ever VPS provider you want.
Once the VPs is up and you’re logged in run the below to update the sources and upgrade any packages that need it. Should not take longer than 5-10 minutes at worst case scenario
sudo apt-get update && sudo apt-get upgrade
Once that’s done, install rclone
sudo apt-get install rclone
Next we need to setup the bucket and fuzz to actually have some media to present to Jellyfin once everything gets up and running.
Login to wasabi console at https://console.wasabisys.com/
A quick Gotcha here. Wasabi really pissed me off as they charge you for deleted storage for 90 days. I’m not sure if I goofed this up somewhere but I have contacted support to find out
Once logged in, go to buckets and create bucket. Name it something like jellyfin-media and select the region that is closest to you. If you’re in Europe, pick the Europe one. It’s located in the Netherlands.
Once the bucket is created, we need to create a policy that works with the bucket. This will be applied to a user later which grants access rights to the bucket and fun stuff.
Click policies on the left hand side navbar

In here, name it something like jellyfin-media-ro or what ever you like. As long as you remember it for later!
Once naming it, paste the below in, but change where it says <bucket name> to the name of your bucket. This will be applied to the docker user we will create next. It’s only given read permissions to the media, just in case something weird happens and jellyfin (or you, no judgment) tries to nuke your files.
{
  "Version": "2012-10-17",
  "Statement": [
    {
      "Effect": "Allow",
      "Principal": {
        "AWS": "*"
      },
      "Action": [
        "s3:GetBucketLocation",
        "s3:ListBucket",
        "s3:ListBucketMultipartUploads"
      ],
      "Resource": "arn:aws:s3:::<bucket name>"
    },
    {
      "Effect": "Allow",
      "Principal": {
        "AWS": "*"
      },
      "Action": "s3:GetObject",
      "Resource": "arn:aws:s3:::<bucket name>/*"
    }
  ]
}
For a user that can upload to the bucket create a policy called jellyfin-media-rw where rw is read write.
As usual substitute the <your bucket> with the name of your actual bucket.
{
  "Version": "2012-10-17",
  "Statement": [
    {
      "Effect": "Allow",
      "Action": "s3:ListAllMyBuckets",
      "Resource": "arn:aws:s3:::*"
    },
    {
      "Effect": "Allow",
      "Action": "s3:*",
      "Resource": [
        "arn:aws:s3:::<your bucket>",
        "arn:aws:s3:::<your bucket>/*"
      ]
    }
  ]
}
Now we can create a user. Click users on the left hand side nav bar.
Click ‘Create user’
I suggest calling it something like docker or jellyfin.
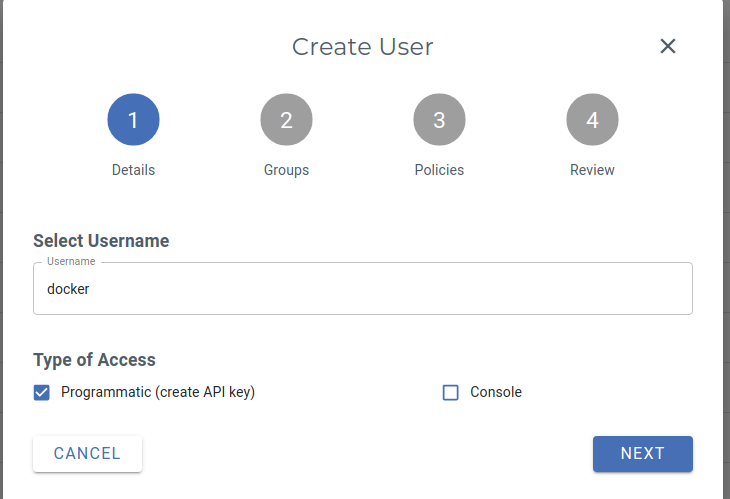
The important part is that you click ‘Programmatic (create API key)
Click next till page 3 where you will assign the policy we created. Here we need the jellyfin-media-ro policy
Once done, wait a few seconds and it will ask you to download the keys. Save these and name them respective of the user.
You will need to do the same thing for the rw user, so create the user and give them the rw policy, naming them something else.
Part 2: The VPS shenanigans
Depending on if you ave docker already installed, you can skip down a bit. If not please read the below:
Run the below commands after each other
curl -fsSL https://get.docker.com -o get-docker.sh
sh get-docker.sh
sudo apt-get install docker-compose
if all went well, docker should be installed
Now we need to get the docker image to actually use. This can be downloaded using the built in docker ‘package manager’ if you will.
docker pull jellyfin/jellyfin
Next, we will create the folder structure.
mkdir docker
mkdir docker/jellyfin
mkdir docker/jellyfin/files
mkdir docker/jellyfin/files/{cache,config,media}
touch docker/jellyfin/docker-compose.yml
If you care, this is what it will look like.
.
└── docker
    └── jellyfin
        ├── docker-compose.yml
        └── files
            ├── cache
            ├── config
            └── media

6 directories, 1 file
Once that is done, move to docker/jellyfin and edit the docker-compose.yml file
sudo nano docker-compose.yml
In the file paste the below and change out <path/to/config> with the full path to the folders. If you’re not sure of them, go to that directory and type pwd
# docker-compose.yaml
version: "3"
services:
 jellyfin:
  image: jellyfin/jellyfin
  user: 1000:1000
  network_mode: "host"
  volumes:
    - </path/to/config>:/config
    - </path/to/cache>:/cache
    - </path/to/media>:/media
Next we need to sort out how to present the bucket to jellyfin. This is where rclone comes in. We installed it at the start!
But before we can start, we need to figure out a way to run the command, and disconnect from that session without stopping the command from running. We will use screen as I am yet to figure out how to use systemd for this
screen
Should show you something like this. if not, sudo apt-get install screen
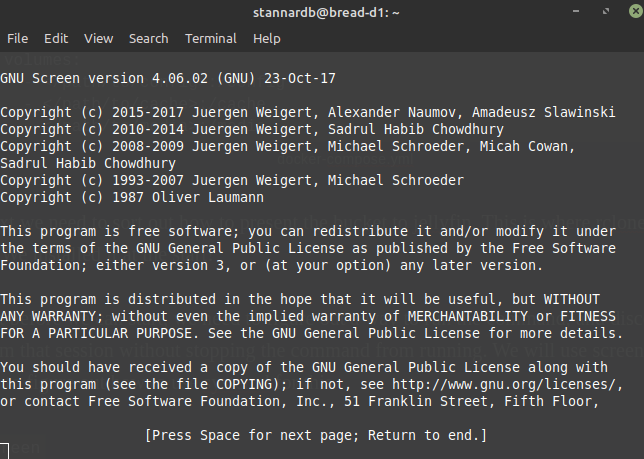
Now that that works, we just press enter and it shows us a command line. Press Ctrl + aand then press d (it’s a weird combo, dont ask)
Now we can configure rclone.
Change directory to .config and if there isn’t an rclone folder there mdkir rclone
nano rclone.conf
paste the below in there.
[media]
type = s3
env_auth =
access_key_id = <first key in .csv file from user creation>
secret_access_key = <second key from user creation>
region =
endpoint = https://s3.eu-central-1.wasabisys.com #if using a europe bucket, else; See below for specifics
location_constraint =
acl =
server_side_encryption =
storage_class =
once done, exit that bad boy. ( ctrl + x``y``enter)
Go to the wasabi interface and click that bucket. Upload your favourite meme or something and then back in your terminal run:
rclone ls media:<bucket name> and you should see the file name there.
If this fails, then I’m not sure what went wrong. Email me and we can sort it out.
Next we need to map the bucket to a folder.
Open screen by typing screen
cd docker/jellyfin/files/
rclone mount media:<bucket name> media --allow-others --daemon
It may throw back an error about using –allow-others, but just do what the command says and edit the file, remove the # in from of the allow_others or what’s closest in the file.
It should return nothing if it worked.
Exit screen with ctrl + a``d
Change to the media folder docker/jellyfin/files/media
list the stuff in there with ls and it should (hopefully) return the file from earlier
Part 3: Making progress
In the folder where the docker-compose.yml file exists, run:
docker-compose up
If all went well, you should be able to visit the IP address of the host and be greeted with the jellyfin create user account
http://<ip/hostname>:8096
I suggest you create the tv, movies, podcasts, skin flic and what ever else folders though the webUI for wasabi then upload your stuff there.
Once everything is uploaded on Jellyfin, add the media as you usually would.
Once done, go back to your command line and kill the docker container with ctrl + c
Now type docker ps -a to see all containers on your host. There should be one called Jellyfin. Make a note of the first 3 characters of the weird looking string before it’s name
The hit it with a docker start <characters> Hopefully it starts and is off to the races. Go back to the url or IP address and continue as you would.
If you want to put it behind a nginx reverse proxy, stay tuned for my next post where I talk about how I have everything behind nginx because I’m too stubborn to learn traefik :)
this was previously posted here but I did a terrible job
You can hire me via Upwork or emailing me for weekend projects!