It’s rare for me to blog about AWS considering I am mainly GCP focused, but this stumped me enough to the point I think it can be of use.
Let’s start
AWS doesn’t allow you to shrink an EBS volume, so our only way to do it is to create a new volume, move everything over then remap it.
Getting started
We will assume:
- An instance running us us-east-1e
- 300GB EBS volume named
old - We want to create a new one of 100gb (we will call it
new-vol)
We need to shut down the instance to prevent issues and inconsistencies.
I suggest snapshotting the old volume before doing any work. This is just a CYA precaution! (Remember to delete it later to save costs)
Install ncdu on the instance (This is just to see the current size of all the files)
Change directory to / and run sudo ncdu
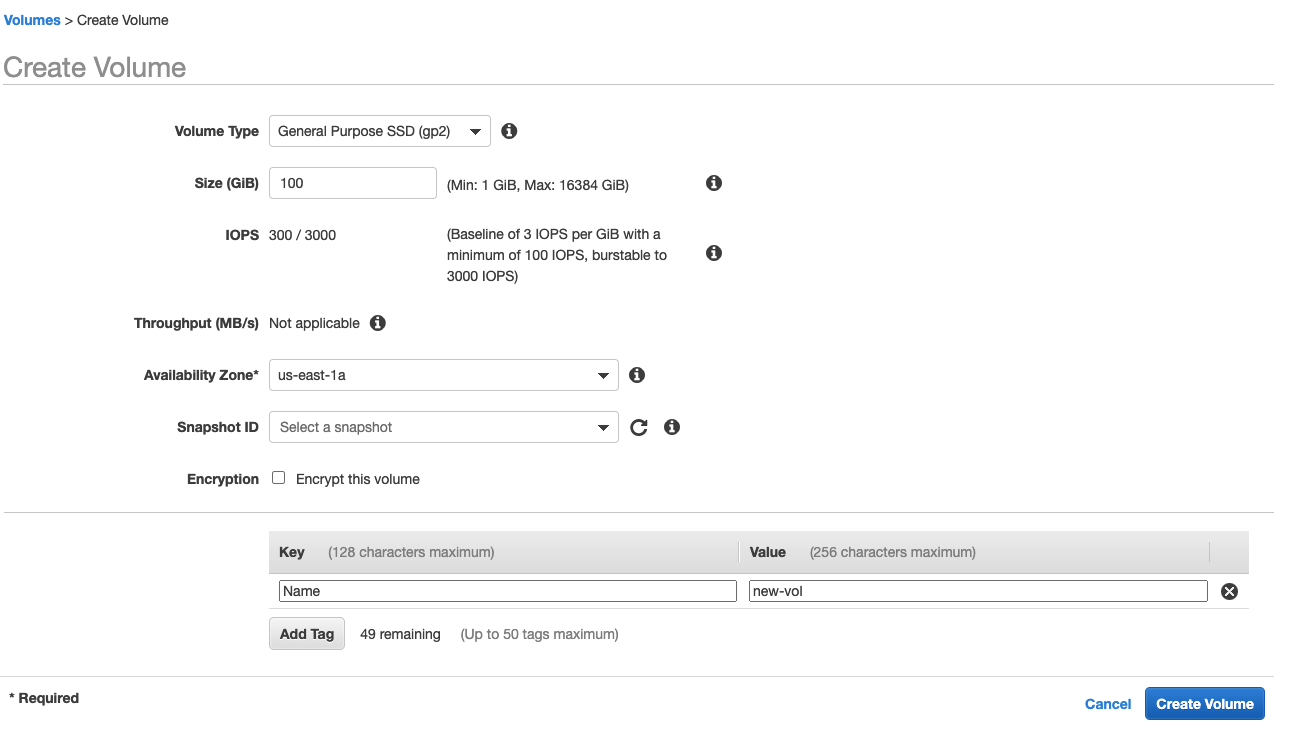
Create the new volume
Choose the region you wish to deploy it to
Choose the size and the type
Add the relevant tags
name:new-vol
 Creating the new VOL
- Shutdown the instance (
sudo shutdownon the instance) - Right-click the new Volume
- Click
Attach Volume - Choose the instance either by Name or ID (I prefer ID)
Now we need to start the instance and format the Volume
Check if the volume has got data on it (Can never be too sure)
sudo file -s /dev/xvdfIt should return
/dev/xvdf: dataIf it does not, stop and re-assess the situation
Format the volume
sudo mkfs -t ext4 /dev/xvdf
Mount the new volume to the instance
Create the directory to mount the disk to
mkdir /mnt/new-volsudo mount /dev/xvdf /mnt/new-vol
Copy data to new Volume
rsync -axv / /mnt/new-vol/
This will take a while, so get on with some other work
Once the copy has finished
Instal
grubon the new volumegrub-install --root-directory=/mnt/new-volume --force /dev/xvdf(centos 7+)
grub2-install --root-directory=/mnt/new-volume --force /dev/xvdfUnmount the directory
sudo umount /mnt/new-volCheck the UUID using
blkid(make note of this, we need it below)tune2fs -U <uuid from ^> /dev/xvdfCheck the volume lable from the old volume using
sudo e2label /dev/xvda1: Should return something likecloudimg-rootfsReplace the volume label with the old value with
e2label /dev/xvdf cloudimg-rootfs
Shutdown the instance
sudo shutdown
Detach the old volume and the new volume from the AWS EC2 console
Attach the new volume (Best to do it by UUID of the EC2 Instance) to /dev/sda1
Start the EC2 instance and SSH
Closing notes
Your milage may vary, we are assuming that you have adequate linux experience
I take no responsibility to any damage caused to your instances during this process, you knew the risks by doing this in prod, you take the fall for it. Learn from it and don’t do it in prod again