
I run 2 incrediblyimportant pieces of software here at breadNET
- Jira (Project management tool)
- Bookstack (Knowledge base articles)
The annoyance comes from having to login to them with 2 separate accounts and a lack of 2 factor authentication.
The aim of this blog post is less of a blog, and more of a How to, hence the How to tag :)
First we will look in to the platform I have decided to go with, why I chose it and what other options there are.
Secondly we will look at setting up LDAP auth for Jira and then Bookstack as well as the issues I faced.
What LDAP system I have gone with?
At my old job back as a welpdesk engineer, I was tasked with looking in to a SaaS based platform for windows based authentication. I had come across a platform called JumpCloud which is a cloud hosted directory platform which pride them selves on “An open directory platform for secure, friction-less access from any device to any resource, anywhere” and from the testing and deployments I have done, I can stand behind them and say this is indeed true.
Why I chose Jumpcloud
There are a few reasons on why I chose to go with Jumpcloud over Okta and Microsoft Azure Active directory
- Jumpcloud is free for up to 10 users, for ever
- I have experience with it
- I have had long conversations with their sales team, so I know the in’s and out’s of their platform
- It’s free.
Setting up Jira with Jumpcloud
The first step is to sign up to jumpcloud. It’s free, so you don’t even need to setup a credit card.
Our first step is to create a Bind user. This is the user that Jira and Bookstack will authenticate with to search the directory.
There are rules with this password that I have found make life easier
- No funky charachters (!’@ etc)
- No
#as in.envfiles and most config files, this is a comment
Create the user, don’t bother with their name and stuff, just make the username bind and set the password. Set their email as [email protected] or a test email account your organisation has - Ensure you set the password as below or you may face issues.
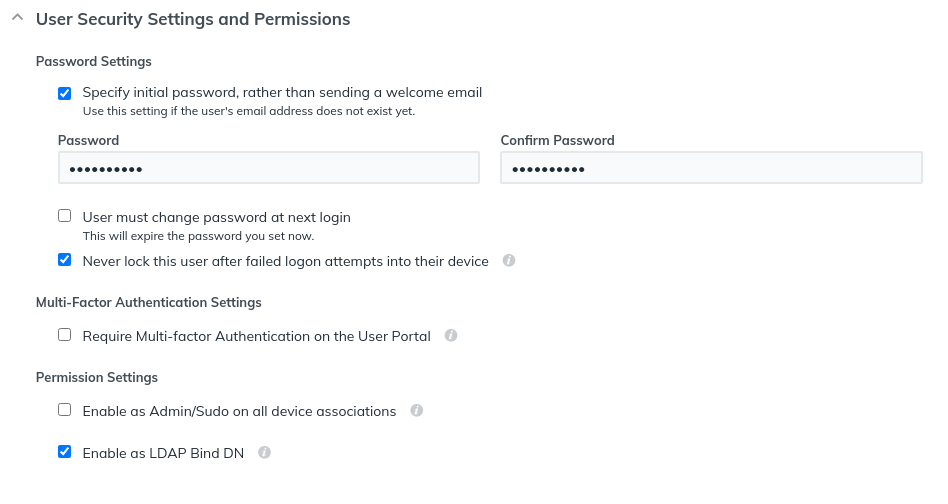 Ensure that you click
 Enable as LDAP Bind DN
Once done, click back in and copy the Base DN
In my case it’s uid=bind,ou=Users,o=5ff9f63bb2433c378b9d8d18,dc=jumpcloud,dc=com
Once this is done, we can head over to the groups and start creating groups.
We need these groups to reflect their exact name in jira. Example below:
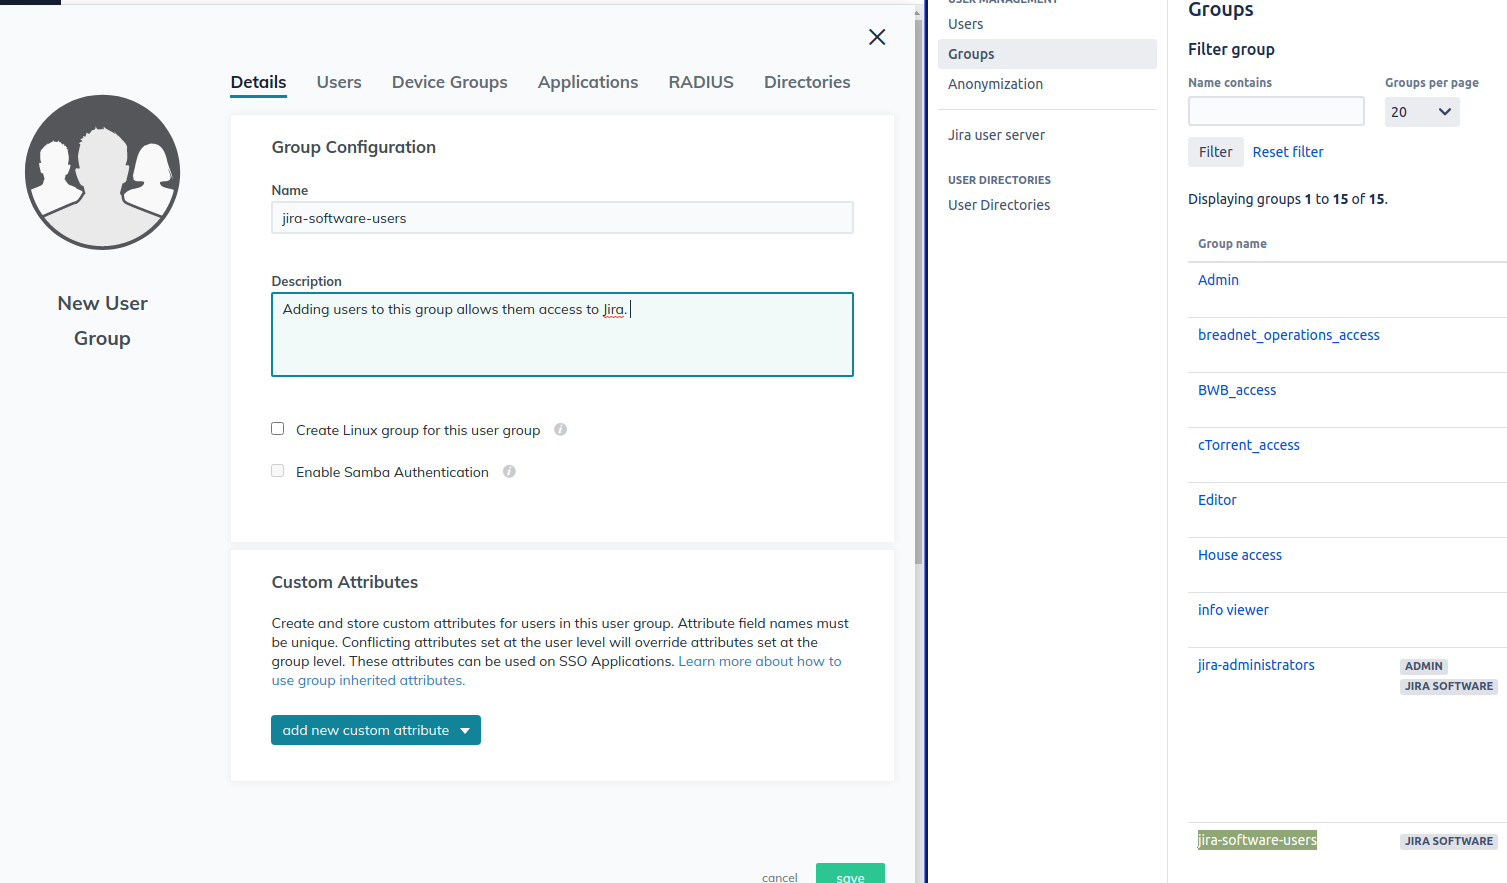 Two groups that we need to ensure we have is
 jira-software-users and jira-administrators as without these groups, adding new admins and users becomes pointless as we will need to then go in to jira and add them to the group, which kind of defeats the point of one source of truth.
Ensure that the group is added to the directory:
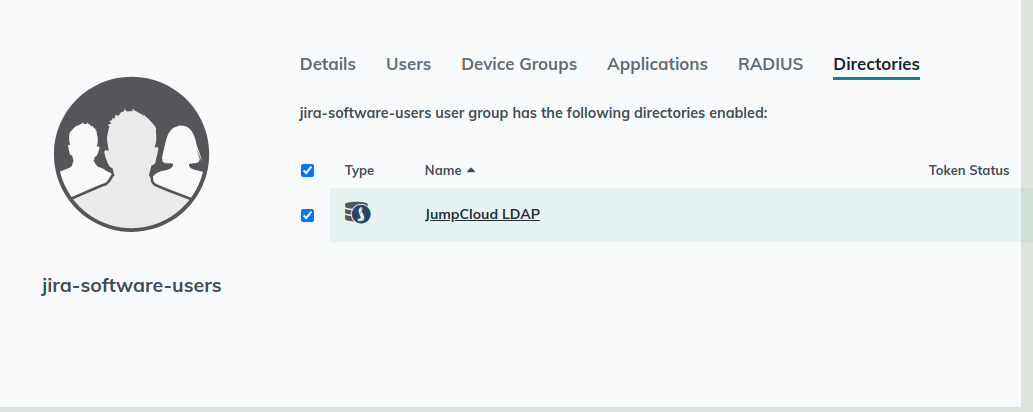 Once this is done, we can go and create a user and then ensure we add them to 2 things, the LDAP directory, and then a jira group we created.
Finally, create a user, add them to the jira-software-users group, and to the Directory.
Now we can move on to setting up jira.
Login to Jira server, click settings at the top then select User Management
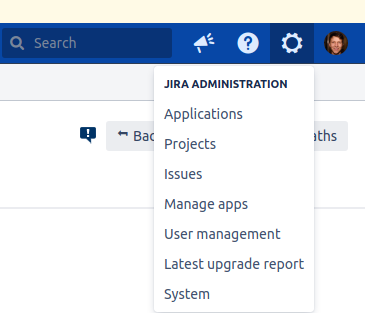 On the left hand side, select
 User Directories then click Add Directory then select LDAP
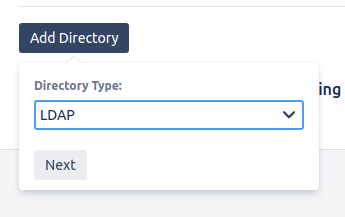 Ensure that we set it to use OpenLDAP
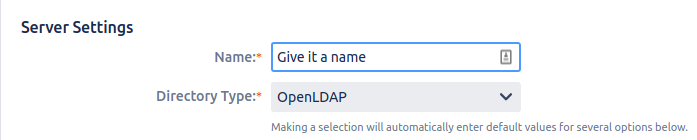 I will break down each field and what to put in there
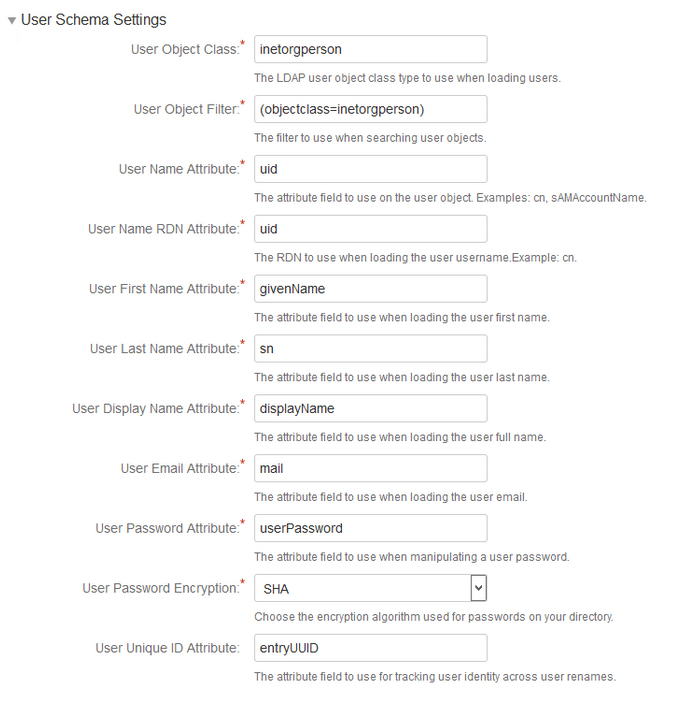
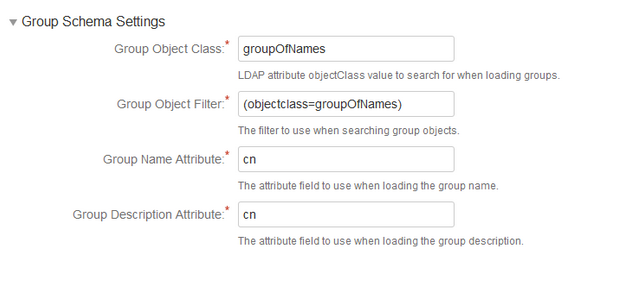
Field namewhat to put thereNameJumpcloudDirectory typeOpenLDAPHostnameldap.jumpcloud.comPort636 (use SSLUsernamebind username dnPasswordPassword of bind dn userBase DNCopy thr org DN and add
I will break down each field and what to put in there
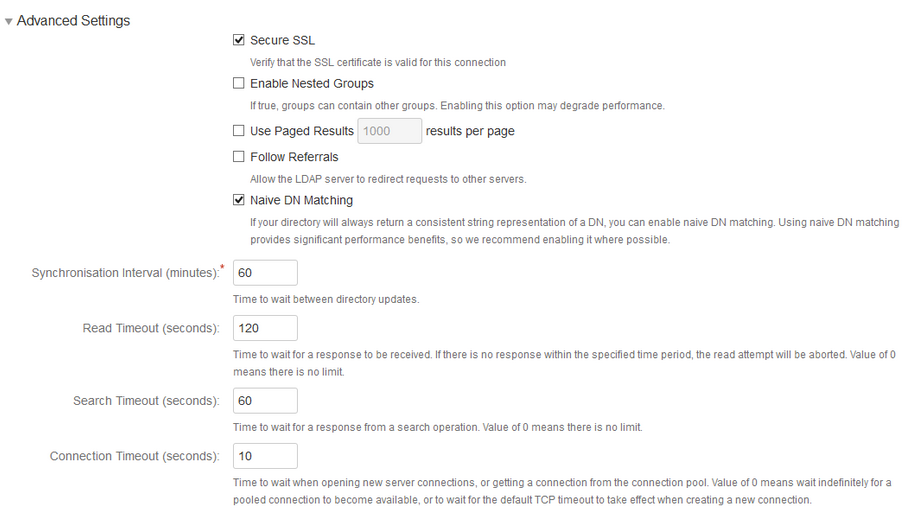
Field namewhat to put thereNameJumpcloudDirectory typeOpenLDAPHostnameldap.jumpcloud.comPort636 (use SSLUsernamebind username dnPasswordPassword of bind dn userBase DNCopy thr org DN and add ou=Users, to the frontLDAP PermissionsRead only, with Local groupsSecure SSLTick boxNaive DN MatchingTick boxUpdate group membership when logging inEvery time the user logs inSynchronisation Interval (minutes)2User Object ClassinetorgpersonUser Object Filter(objectclass=inetorgperson)User Name AttributeuidUser Name RDN AttributeuidUser First Name AttributegivenNameUser Last Name AttributesnUser Display Name AttributedisplayNameUser Email AttributemailUser Password AttributeuserPasswordUser Password EncryptionSHAUser Unique ID AttributeentryUUIDGroup Object ClassgroupOfNamesGroup Object Filter(objectclass=groupOfNames)Group Name AttributecnGroup Description AttributecnGroup Members AttributememberUser Membership AttributememberOf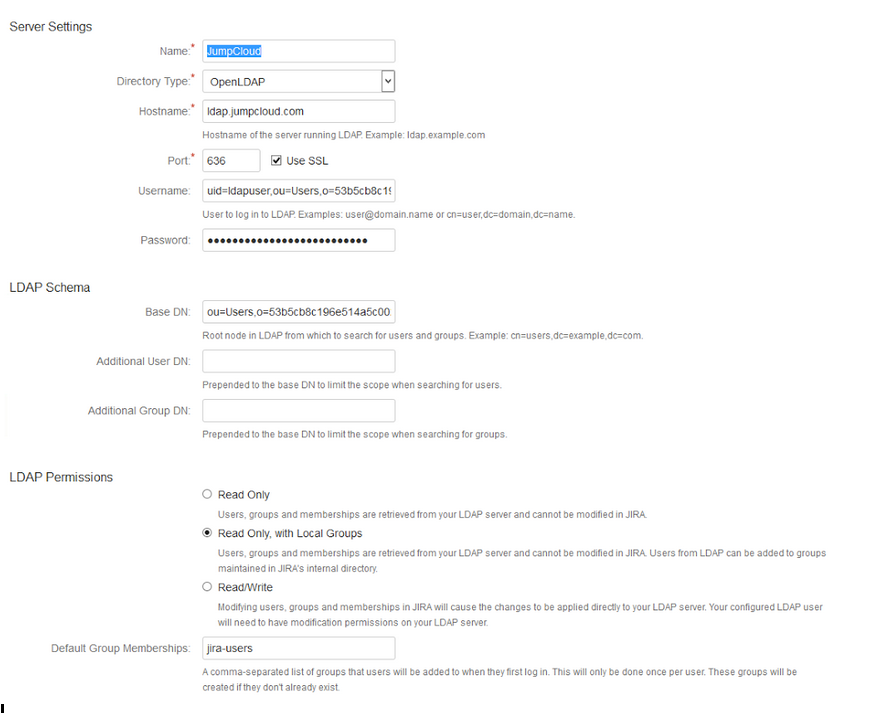
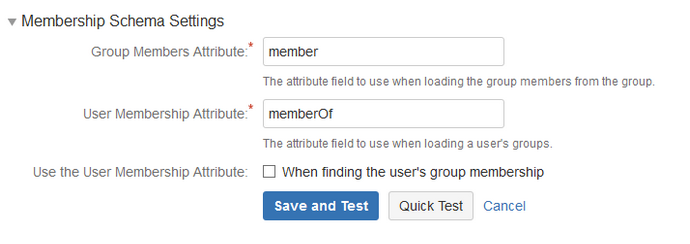 Then click save and test.
Go to user management and go to User Directories, then click Sync.
Nice! Now it’s set up!
You should see the test user appear and be able to login with their username and password.
If you want to sync users that already have local jira accounts, to ldap, just create their user in Jumpcloud with their email address, username and a new password.
Synch the directory and then delete the local user. You should see a message saying that the user exists in 2 directories. If you don’t see this, stop. Fix the synch.
Bookstack
Bookstack has some realllllly beautiful documentation so this was a pure breeze, but there’s some issues that I came across.
I highly suggest that you start this with creating users and groups in Jumpcloud before making config changes.
Now we can ssh to the server and start to hack at the .env file.
Firstly login as the admin account to your instance, then go to users and your profile.
We need to add the below to the file.
APP_DEBUG=true #change to false once it works
AUTH_METHOD=ldap
LDAP_SERVER=ldaps://ldap.jumpcloud.com:636
LDAP_BASE_DN=ou=Users,o=<org id>,dc=jumpcloud,dc=com
LDAP_DN=uid=bind,ou=Users,o=<org id>,dc=jumpcloud,dc=com
LDAP_PASS=<bind user password>
LDAP_USER_FILTER=(&(uid=${user}))
LDAP_VERSION=3
LDAP_ID_ATTRIBUTE=uid
LDAP_EMAIL_ATTRIBUTE=mail
LDAP_DISPLAY_NAME_ATTRIBUTE=cn
LDAP_USER_TO_GROUPS=true
LDAP_GROUP_ATTRIBUTE="memberOf"
LDAP_REMOVE_FROM_GROUPS=false
Replace <org id> with your org id from jumpcloud and <bind user password> with the bind user’s password.
Restart nginx or apache or what ever you’re running and login with a user account.
Refresh the page on Bookstack and you will see the below
 Fill the box out with the username that you’ve used in jumpcloud for your account, then open an incognito window and then try logging in with your jumucloud username
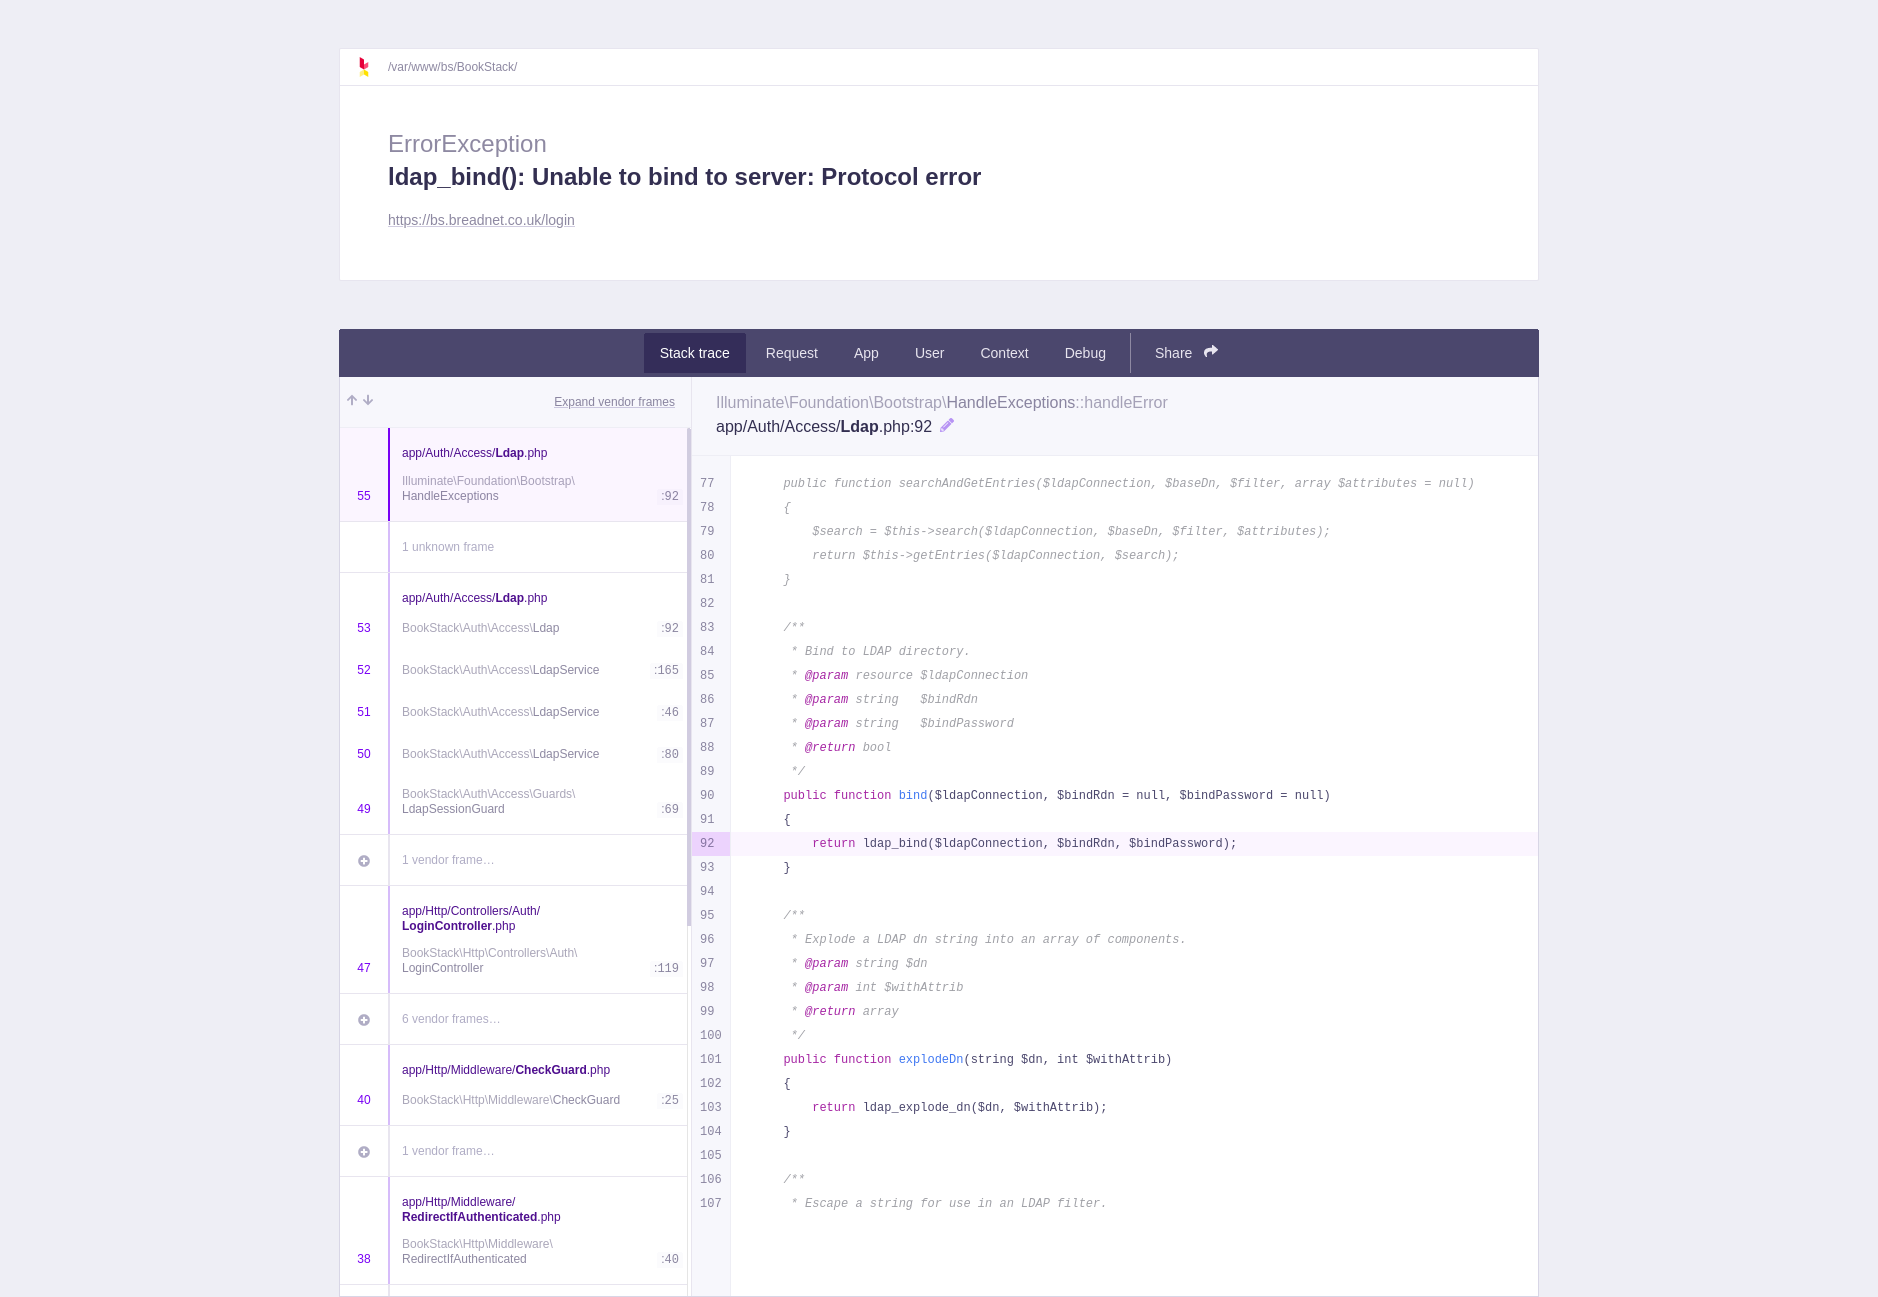
If you see this, then you’re in trouble! Get in contact and I can see what I can do to help!
 Once you’ve verified that logins work, edit the
 .env file set APP_DEBUG=false and restart nginx.
Congrats, you now have LDAP setup!
You can hire me via Upwork or emailing me for weekend projects!