
Sweet, you just got a linux server running on <insert cloud provider > but now you need to actually do something on it.
You tried to use the web console but now you need to paste something in… It doesn’t work? Shit. Luckily SSH was designed to allow for Secure SHell access to a server. (Hence SSH)
We will look in to the basics of how to connect, using keys, config files and going passwordless!
Basically stops you doing what the goons in the photo are doing, sitting next to the servers to manage them
Phase 1: The connection
Now that your fresh server is waiting for you to come in and unleash 12 levels of hell on it, we need to connect.
Depending on what Operating system you are using, your milage may vary.
If you are on windows you can download a tool called Putty from here (their website if you don’t trust my links)
But if memory servers correctly, Windows 10 has SSH baked in to the cmd app.
Where as if you are on Linux, SSH is built in!
Start by opening your terminal program. On ubuntu and ubuntu based OS’ press ctrl + alt + t or on windows win + r then type cmd
Next we will have to tell the computer what to do, what user we want to connect as and where the server is located.
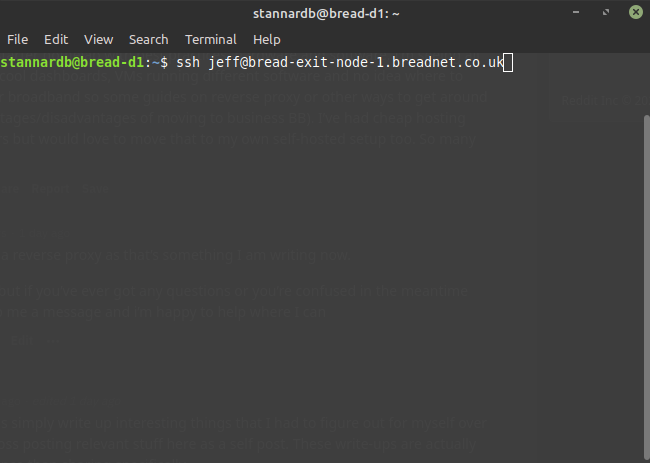
In your terminal window type the below. If it does not make sense how I have presented it, have included a picture:
ssh <username>@<host/ip>
Depending on your config, you may either get presented with 1 of many results. Below are common ones I see day to day, and you may encounter the first time you SSH:
The authenticity of host 'bread-exit-node-1.breadnet.co.uk (203.192.192.24)' can't be established.
ECDSA key fingerprint is fd:fd:d4:f9:77:fe:73:84:e1:55:00:ad:d6:6d:22:fe.
Are you sure you want to continue connecting (yes/no)?
Type yes
Once it’s gone though you will be presented with a linux shell. Go wild!
To get back to your local machine, type exit
Phase 2: Keys
Whilst SSH is secure if done correctly, you really want to avoid using a password to login as if someone gets your password they have the ability to login from anywhere regardless of what machine they are on. To combat this, we use SSH keys.
Sadly I only know Linux for this bit, but luckily the good folks at Ubuntu pulled though and saved me!
(guess that’s another reason to move to linux)
Generate SSH Keys on Windows 10
Ubuntu is an open source software operating system that runs from the desktop, to the cloud, to all your internet connected things.
On linux, type
ssh-keygen
This will return something similar to
stannardb@bread-d1:~$ ssh-keygen
Generating public/private rsa key pair.
Enter file in which to save the key (/home/<username>/.ssh/id_rsa):
Just press enter
Important to read the next step
If you are presented with the below. Press n
/home/<username>/.ssh/id_rsa already exists.
Overwrite (y/n)?
If not, then it will continue to asking you for a password. I suggest pick a strong one, it will encrypt the private keyflie on the disk.
Now you have your keys, lets take a second to explain them.
cd to the .ssh folder and list the content
cd .ssh
ls
You will see 2 files at minimum, one called id_rsa and id_rsa.pub
DO NOT EVER GIVE ANYONE
ID_RSA
The file named id_rsa is your private key and id_rsa.pub is your public key. Weird huh. Let me explain it quickly.
Imagine you have a post box at the front of your house, it has 2 doors. One on the top where people can put post, and one on the front for retrieving post. This postbox has 2 locks. One on the top flap and one on the big door to get post.
The public key can be compared to giving all your friends and the Postal workers a key each, to access the top flap so they can put post in to your postbox. You want as many people to have this so it makes recieving post simple.
Where as the private key is the key that opens the main flap to get out the post. You really don’t want anyone to get this key as they will have full roam to your mailbox.
You would give your public key to your friends who have servers so you can login, and they do the same.
To drive the point home, imagine the private key is your underwear that your mom purchased, it has minnie the mouse on it. I don’t know about you, but I don’t want anyone to see them.
Now we have that out the way, we can talk about how it makes our lives easier.
We need to copy our keys to the remote server that we plan to log in to. Luckily (as usual) linux has a built in tool for this. For some reason, they named it ssh-copy-id , odd.
The syntax for this is:
ssh-copy-id <username>@<remote_server>
So if I wanted to copy my desktops keys to my exit node:
ssh-copy-id [email protected]
It will ask for a password, then once that’s in you’re good to go.
Try SSH to the host again, and you hopefully wont be asked for a password.
Phase 3: Config file
So now that we have been using SSH for a while, it gets annoying having to type out the username, server name and sometimes port mapping (appending -p <port if you wanted to know)
SSH can make use of a config file with a specific syntax to speed up connecting to a server. It allows something like the below where we can give our servers human names if you’re in to that
ssh jeffserver
To achieve this level of godly-ness we need to create the config file.
Run the below to create the file, or edit it if you already have one.
nano ~/.ssh/config
This will either open up a file with a config or a blank file.
In the file we need to specify at minimum 3 things. What we will call it, the address and what user
### domain name example
Host india-exit
  HostName bread-exit-node-1.breadnet.co.uk
  User root

  ###IP address example
  Host india-exit-ip
   Hostname 203.192.192.24
   User root
Feel free to copy the above for formatting.
Just know you cant use spaces for names
Now save the file with ctrl + x``y``enter
Try ssh to the name you gave it. (This is the word that follows after Host)
It should work if all went well.
Now I know my windows friends are complaining ‘but what about us’
Move your public key (id_rsa.pub) and your private key (id_rsa) to C:\Users\yourUserName\.ssh\ create the .ssh folder if needed.
2. On your windows host via cmder:
cp C:\Users\yourUserName\.ssh\id_rsa.pub C:\Users\yourUserName\authorized_keys
3. On your ubuntu host:
service ssh status Start sshd if necessary
mkdir ~/.ssh/ (if it doesn’t already exist)
4. On your Windows host via cmder:
cd C:\Users\yourUserName\
scp authorized_keys login-id@ubuntu-Host-Ip:~/.ssh
5. On your Ubuntu host:
chmod 700 ~/.ssh
chmod 600 ~/.ssh/authorized_keys
6. On your Windows host via cmder:
Test if you can ssh into your ubuntu host without login/pw auth. If yes:
rm C:\Users\yourUserName\authorized_keys
Phase 4: Look mom, no password
Now this has the potential to really ruin your day if it goes wrong, so I suggest open 2 ssh sessions to the server. One you will leave in the background logged in and at a sudo terminal ( sudo -s) and one where you will do the work in. This is just in case something goes wrong!
Before completing the below steps, ensure you can ssh to the server using keys only.
We will start by disabling Password based authentication
On one of the sessions, type
sudo nano /etc/ssh/sshd_config
In the file, locate the line PasswordAuthentication
Set it to no so it looks like the below
PasswordAuthentication no
Here comes the part that will ruin your day if goofed up. Just putting this out there, but I accept to responsibility if you goof up.
sudo service ssh restart
Now logout (exit) and ssh to the server. If all is good, you should have no problem logging in.
However, should you not be able to, just open the other window we had and revert the changes, restart the service and work out the problems you may have had!
To wrap it up:
You should now have SSH knowledge and a place to start in the world of managing linux based server’s over SSH, how to setup and use keys and how to stop using passwords.
If you’re ready to move on to something a little more complex, check out the below!
You can hire me via Upwork or emailing me for weekend projects!